Adding Personnel
Load all your personnel on the system to begin clocking in/out and tracking time & attendance according to your financial month.
View GuideManagers can at any time view the attendance of all personnel and pull reports for the entire company, or for specific personnel. There are two kinds of attendance reports that can be downloaded: Reports containing hours worked by all staff in the company (i.e. a company-level report), and reports for hours worked by a single employee (i.e. employee-level report).
How are hours calculated?
Night Shifts: Shifts that run through midnight are considered as night shifts.
Shifts crossing Financial Month-End: Shifts that start on the last day of the financial month but end in the next financial month are considered part of the next financial month.
Step 1: Download a Company Report
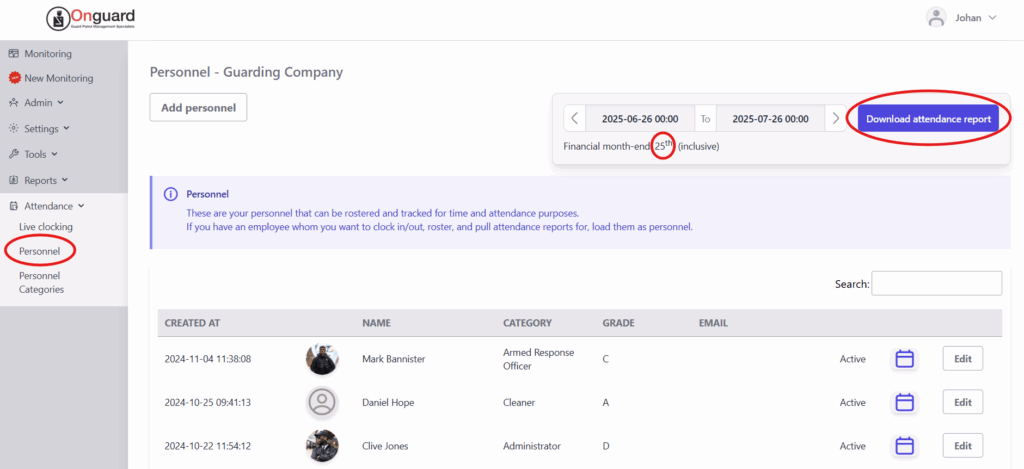
In the main menu on the left, navigate to the "Attendance" tab and click "Personnel". This will open the view of all personnel listed under your company.
In the top right corner is a panel for downloading attendance reports for the company. In the date picker, select the desired financial month. Note that the financial month-end date for your company is displayed just below the date picker. If your company has a different financial month, kindly contact support and we'll change it for you.
Click the download button to get a PDF. The report will contain the hours worked by all staff in the company for that period.
Step 2: Open a Personnel Calendar
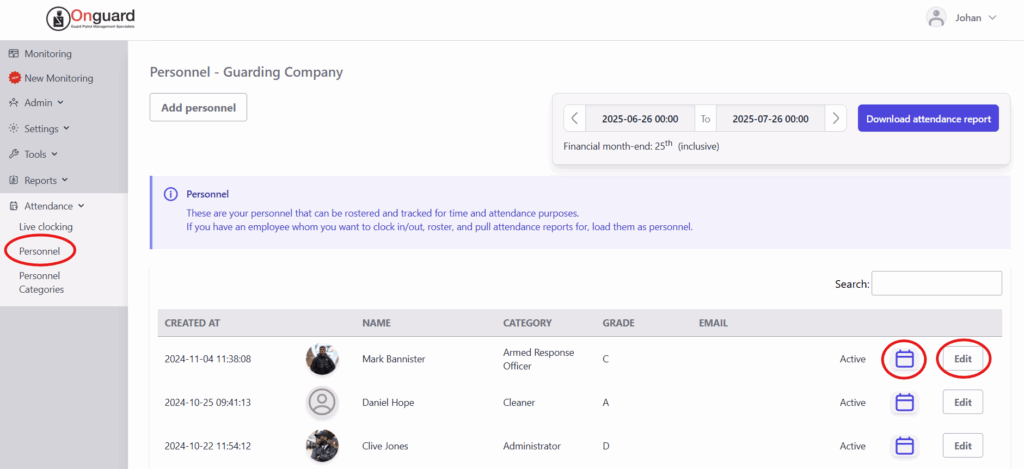
(Optional) To get a quick calendar view of the shifts worked by a specific employee, click on the calendar next to their name.
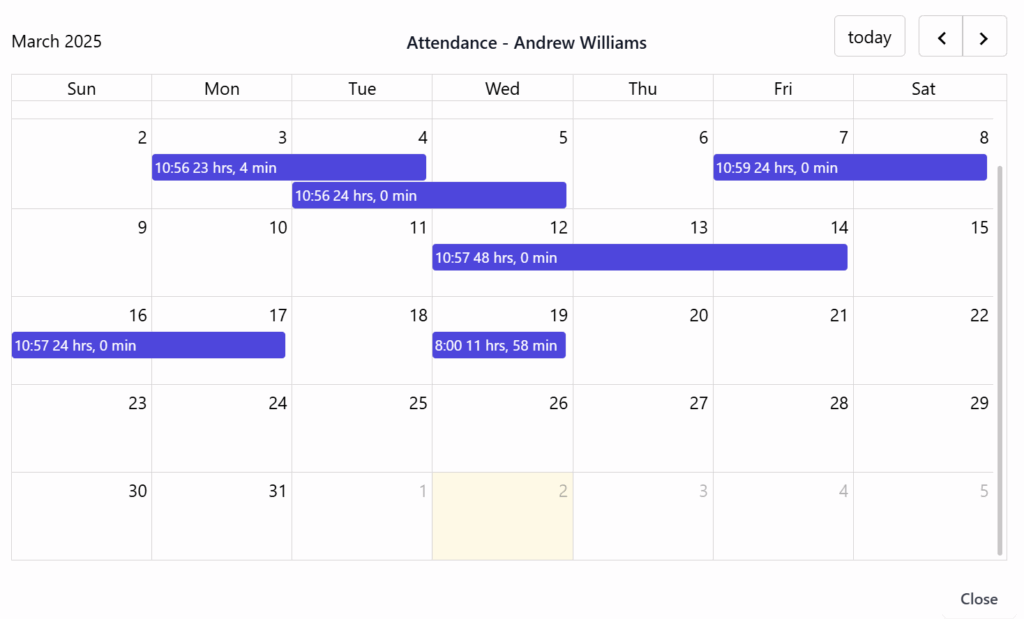
Step 3: Review the Calendar
Use the quick calendar to review the employee's shifts, then close it when finished.
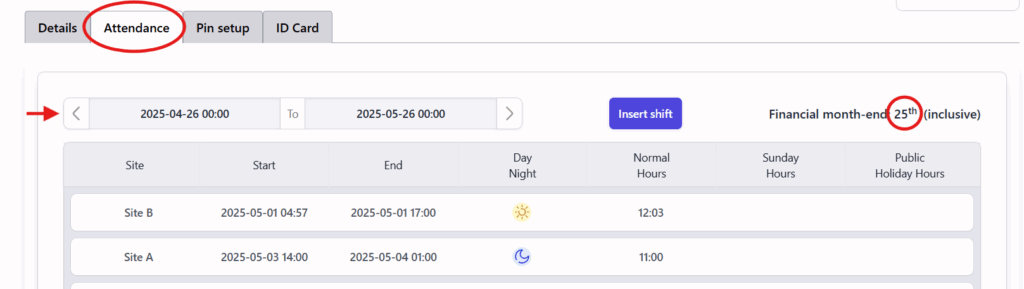
Close the calendar and click "Edit" next to the employee's name. This will open their profile. Navigate to the "Attendance" tab. This will open a detailed view of all the shifts worked by the employee for any given financial month.
Use the date range picker to move through different financial months. Once again, note the financial month-end date displayed on the right.
Step 5: Download the Personnel Report
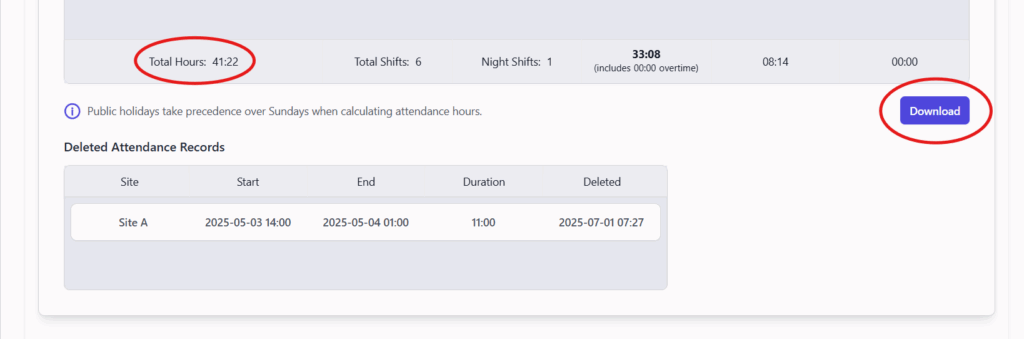
Scroll down until you see the "Download" button. A detailed breakdown of the hours worked is displayed at the bottom of the viewer. Download the PDF.
Keep learning
Continue exploring tutorials in this section.
Load all your personnel on the system to begin clocking in/out and tracking time & attendance according to your financial month.
View GuideUse the mobile app to snap photos and upload to Onguard. Profile pictures of personnel appear on the live attendance page and are used on ID cards.
View GuideClock in and out using your standard-issue NFC attendance tag. Any of your OG-66 devices can be used as a clock-in point.
View Guide